I am assuming that you already have NPM(Nodejs Package Manager) Installed on your computer (because you will need it - you can find more information on the official website) It is important to double check that you have a recent version of Nodejs (executing node --version) I am using Windows to make this work.
Angular2 requires a bit of setup to get started. to avoid the headaches associated with setup,the Angular team came up with the Angular CLI. The Angular2 CLI makes it easy to create an application that just work out of the box.
Angular2 requires a bit of setup to get started. to avoid the headaches associated with setup,the Angular team came up with the Angular CLI. The Angular2 CLI makes it easy to create an application that just work out of the box.
Install the Angular 2 CLI globally:
npm install -g angular-cli
Note: The Angular team has decided to drop the 2 from the name. So, it is now called Angular instead of Angular 2. For the sake of this tutorial, I’ll use Angular 2 to prevent confusion from developers just trying out the framework for the first time.
Use these commands to simply create your app and run it:
ng new myapp // creates a new app ng generate // generates components, routes, services and pipesng serve // serves your applicationinthe browser
In this tutorial, we’ll avoid using the CLI and learn how to set up our development environment from scratch.
Setup your base project.
Quiickly go ahead and create a new directory,
newapp.Move into the directory and create an index.html
<!DOCTYPE html>
<html lang="en">
<head>
<meta charset="UTF-8">
<title>Angular 2 application</title>
</head>
<body>
<h2>Setting up my development environment</h2>
</body>
</html>
Create another file,
package.json by running the npm init -y command from the terminal Let’s install a package, lite-server, that will allow us to serve our application like so:npm install --save-dev lite-server
Note:
lite-servecomes bundled with browser-sync which automatically reloads the browser when our files change
Open up
package.json to configure lite-server like so:"scripts": {
"test": "echo \"Error: no test specified\" && exit 1",
"lite": "lite-server"
}
Now run

Change something within your
npm run lite from your terminal, your browser should open up displaying your application and in your terminal, you should see something like this:Change something within your
index.html file and you’ll discover that your browser refreshes automatically and reflects that change!Configuring the TypeScript Language
Typescript is not requried to write Angular2. but i have chosen this option because of the type system it offers and if you are coming from C# it is really easy to get used to it you can write pretty much your Angular 2 application using normail ECMAScript5(Standerd javascript where most of the apps are written).
So let’s go ahead and install TypeScript like so:
npm install -g typescript
Create a file,
tsc --init --target es5 --sourceMap --experimentalDecorators --emitDecoratorMetadata
tsconfig.json in your directory. tsconfig.json indicates that the directory is the root of a TypeScript project. we can compare it as a project soluation (.sln) in MVC project.tsc --init --target es5 --sourceMap --experimentalDecorators --emitDecoratorMetadata
tsconfig.json and add the following:
{
"compilerOptions": {
"target": "es5",
"module": "commonjs",
"moduleResolution": "node",
"sourceMap": true,
"emitDecoratorMetadata": true,
"experimentalDecorators": true,
"removeComments": false,
"noImplicitAny": false,
"outDir": "build",
},"exclude": ["node_modules"] }
target es5: Allows Specify that we want to get our TypeScript code compiled to ECMAScript 5 and we can run our code in older browsers.
sourceMap: Allows us to generate the source maps, i.e files that contain mappings between the generated ES5 code and the original TypeScript code.
experimentalDecorators & emitDecoratorMetada: We need those flags to compile, transpile to ECMAScript 5 as we are using TypeScript with decorators (to annotate and modify classes and properties at design time, it basically says things like — ‘this is a custom property’ or ‘this class is a component (@Component, decorator)).
experimentalDecorators & emitDecoratorMetada: We need those flags to compile, transpile to ECMAScript 5 as we are using TypeScript with decorators (to annotate and modify classes and properties at design time, it basically says things like — ‘this is a custom property’ or ‘this class is a component (@Component, decorator)).
Setting up package.json
package.json file also be requried. in package.json we will have all the dependence and task which we will use in development. run below command it will initiate a intractive workflow.
npm init
it will ask you somthing like this. and you need to enter below information.
Name:[ENTER YOUR APP NAME]
Version:1.0.0
Description:[ENTER ANY NICE DESCRIPTION]
main:index.js
Author:[YOUR NAME]
Setting up Concurrently
Concurrently is a nodejs package that allows us to run multiple commands concurrently. Let’s pull in the package.
npm install concurrently --save-dev
With Lite-server and Concurrently are only required for development so we have added
--save-dev as a parameter.
Open and add the following code in your package.json which should be available at your root folder. these tags are tasks which will be used for (watch) reloading script on code change and (serve) for hosting our application locally.
"scripts": {
"start": "concurrently \"npm run watch\" \"npm run serve\"",
"watch": "tsc -w",
"serve": "lite-server"
}Install Angular 2
With great power, comes great responsibilities. Angular 2 depends on some libraries & tools to wield such power.
1) Zone.js simply makes our debugging much productive and supports change detection in our code
2) Core-js standard library for JavaScript that includes polyfills for ES5, ES6, ES7 features in browsers
3) rxjs hands us observables and asynchronous data streams
npm install --save @angular/common@2.4.0 @angular/compiler@2.4.0 @angular/core@2.4.0 @angular/platform-browser@2.4.0 @angular/platform-browser-dynamic@2.4.0 @angular/router@3.4.0 systemjs@0.19.40 core-js@2.4.1 reflect-metadata@0.1.8 rxjs@5.0.1 zone.js@0.7.4
Your package.json should looks like this..
{
"name": "setup",
"version": "1.0.0",
"description": "Angular2 project setup",
"main": "index.js",
"scripts": {
"start": "concurrently \"npm run watch\" \"npm run serve\"",
"watch": "tsc -w",
"serve": "lite-server"
},
"author": "Omi Amarwal",
"license": "ISC",
"dependencies": {
"@angular/common": "^2.4.0",
"@angular/compiler": "^2.4.0",
"@angular/core": "^2.4.0",
"@angular/platform-browser": "^2.4.0",
"@angular/platform-browser-dynamic": "^2.4.0",
"@angular/router": "^3.4.0",
"core-js": "^2.4.1",
"reflect-metadata": "^0.1.8",
"rxjs": "^5.0.1",
"systemjs": "^0.19.40",
"zone.js": "^0.7.4"
},
"devDependencies": {
"concurrently": "^3.3.0",
"lite-server": "^2.2.2"
}
}
Setting systemjs.config.js
We need a loader to help load all the angular packages that we use in the app. Angular needs a tool to point it to where each and every package is whenever it invokes the package functionalities. SystemJS is a universal dynamic loader. It loads ES6 modules, CommonJS, AMD and global scripts in the browser and NodeJS.
Create a new file,
https://github.com/OmprakashAmarwal/StartAngular2/blob/master/systemjs.config.jssystemjs.config.js, the SystemJS configuration file in the root directory.
It looks for the application files to run in the
app directory, you can change it to whatever directory you want. You can also see that it has specified what directory to look for angular packages, node_modules/@angular.
Take another good look at this section too:


This config lets SystemJS know how and what to load in the app.
Now head over to your
index.html and reference the polyfills we installed earlier. Then load SystemJS like so:<!DOCTYPE html>
<html lang="en">
<head>
<meta charset="UTF-8">
<title>Angular 2 app</title>
<script src="node_modules/core-js/client/shim.min.js"></script>
<script src="node_modules/zone.js/dist/zone.js"></script>
<script src="node_modules/reflect-metadata/Reflect.js"></script>
<!-- Load our angular app with Systemjs -->
<script src="node_modules/systemjs/dist/system.src.js"></script>
<script src="systemjs.config.js"></script>
<script>
System.import('MyApp').catch(function(err) { console.error(err); });
</script>
</head>
<body>
<h2>Setting up my development environment</h2>
</body>
</html>
Run npm start
That’s all really, no more steps needed! You are ready to create your first Angular 2 app using TypeScript.
That’s all really, no more steps needed! You are ready to create your first Angular 2 app using TypeScript.
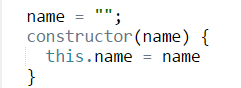
Create app folder at root and create a new file inside it with name app.component.ts and add our first component. In this tutorial, all our .ts files will be maintained in this app folder.
app.component.ts
import { Component } from '@angular/core';
@Component({
selector: 'my-app',
template: <h1>Setting up my development environment</h1>'
})
export class AppComponent { }
To bundle our app modules, add a new file with name app.module.ts.
app.module.ts
import { NgModule } from '@angular/core';
import { BrowserModule } from '@angular/platform-browser';
import { AppComponent } from './app.component';
@NgModule({
imports: [ BrowserModule ],
declarations: [ AppComponent ],
bootstrap: [ AppComponent ]
})
export class AppModule { }
Add directive in Index.html
<body>
<my-app>Loading...</my-app>
</body>
Ok, now let's bootstrap our code by adding a new file main.ts
main.ts
import { platformBrowserDynamic } from '@angular/platform-browser-dynamic';
import { AppModule } from './app.module';
platformBrowserDynamic().bootstrapModule(AppModule);
This is how our folder structure should look like:

In command prompt / terminal window, execute the below command.
npm start
npm will read your package.json file and execute start command which we added in scripts section. Once npm start has been executed successfully, you should be able to see application page at http://localhost:3000.
Since
npm start is also configured for auto load any changes made to code file, this will automatically reload your page on code change save. For testing the same, make changes to app.component.ts and save. You should be able to see that the application page is now automatically updated to newer text.
You can download the code from here.